Time to customize your space to your heart's content! ❤️
Adding/Editing Floors and Walls 🎉
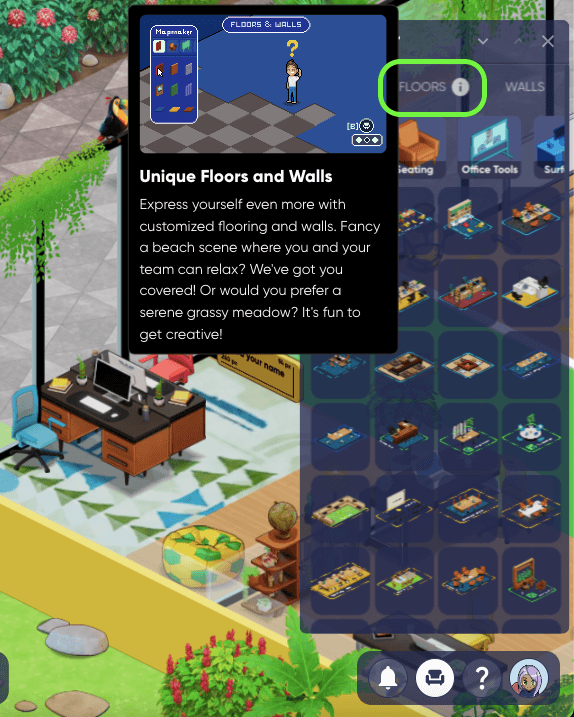
To change the floors using Mapmaker, press 'B', and scroll over to the 'Floors' area.
To change the walls using Mapmaker, press 'B', and scroll over to the 'Walls' area.
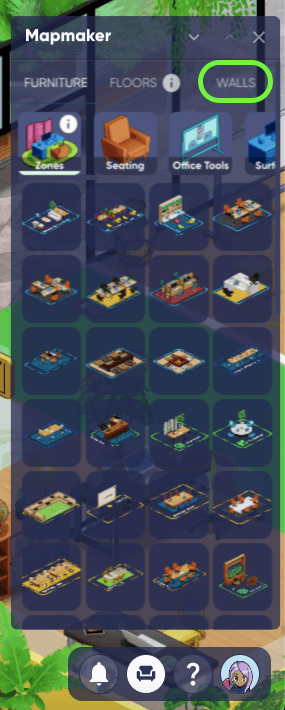
Once there, you'll see a large selection of wall and flooring options (moss, glass, concrete, tile, brick, sand, wood, etc.).
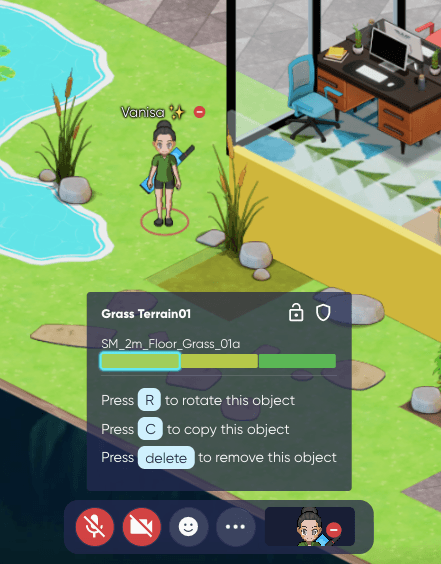
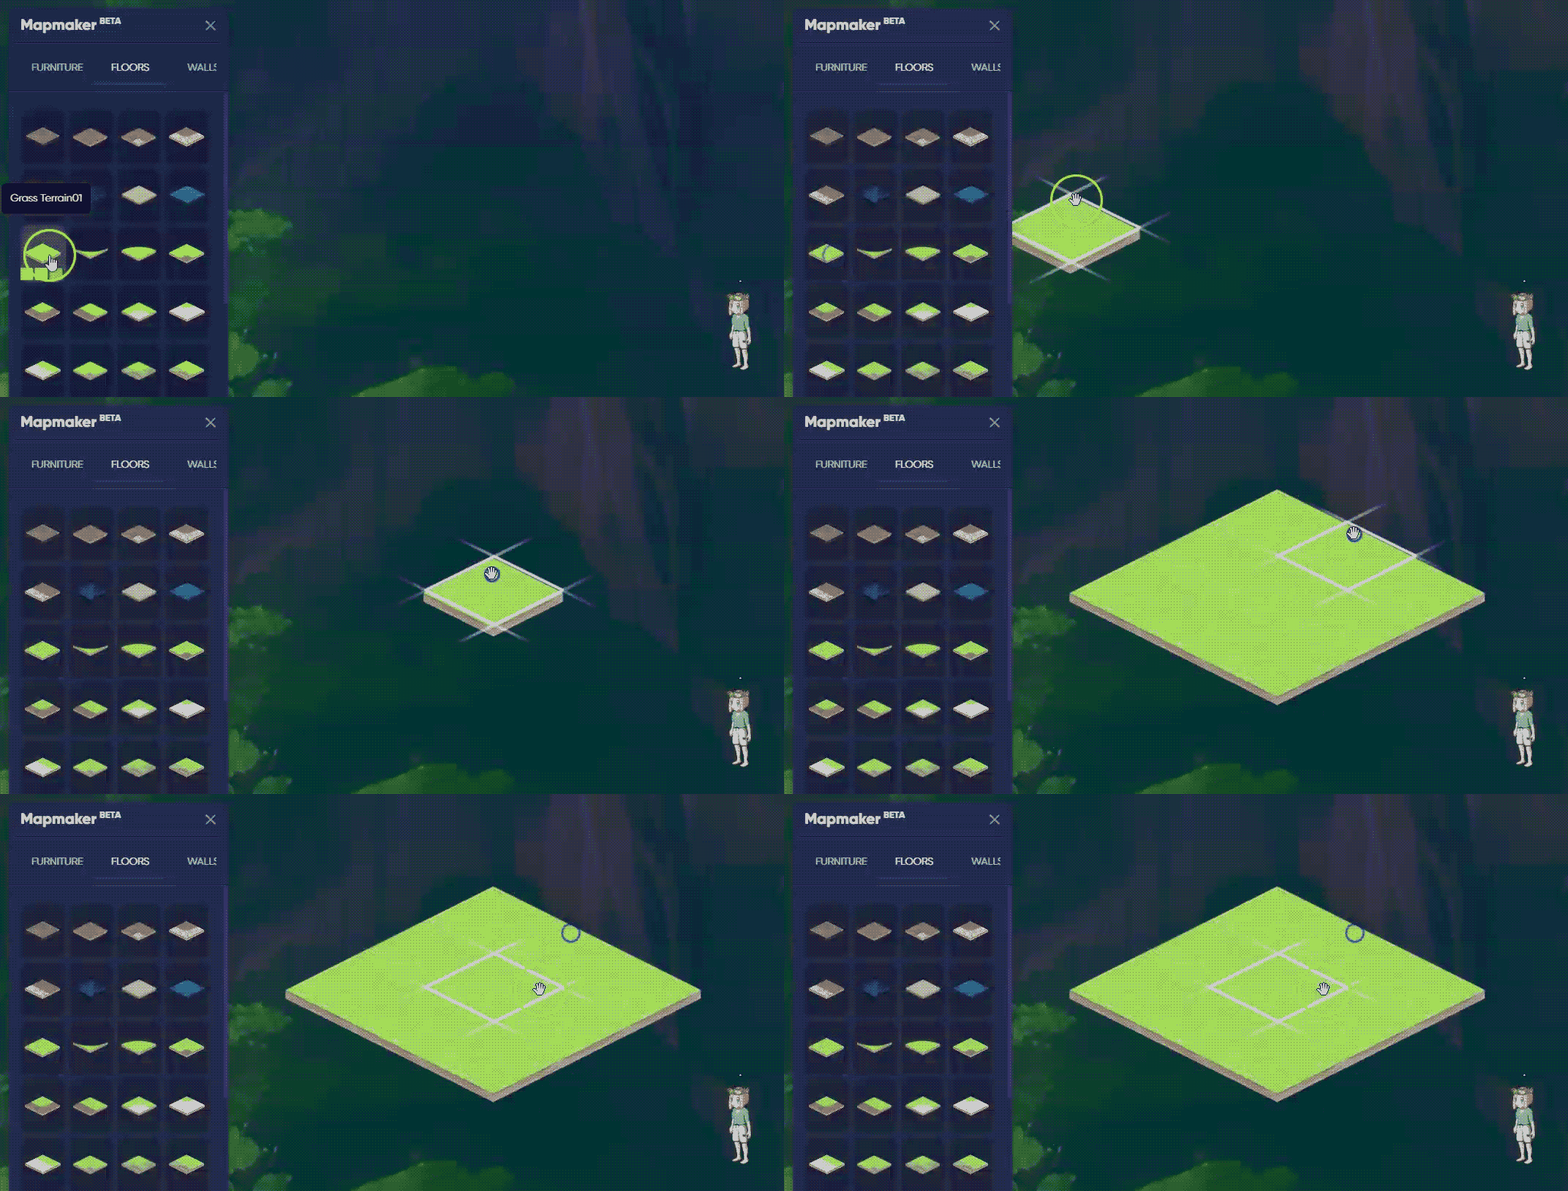
Let's say I'd like to change this grassy patch to wood flooring. All you need to do is:
✨ Select the flooring type you'd like from the 'Floors' menu
✨ Drag to it's new location, and click to place it down
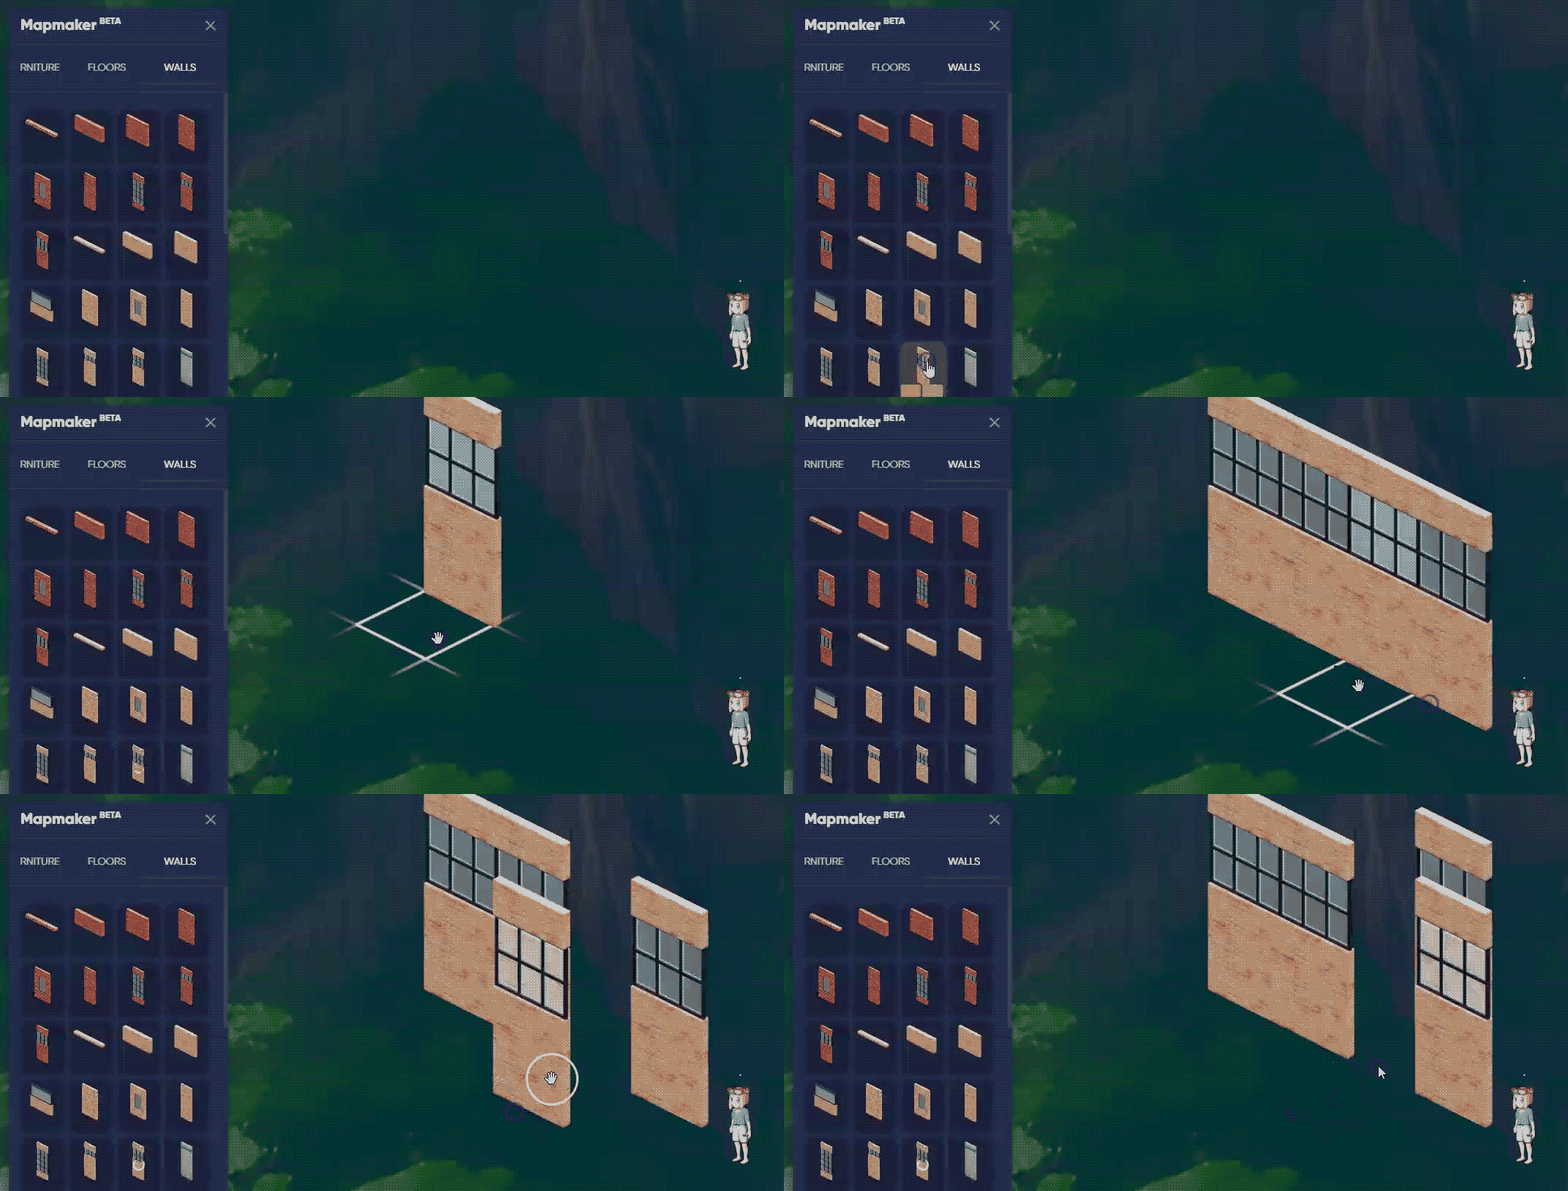
✨ In the 'Walls' menu, you can follow these same steps to select and place a wall - nice!
Ooops, made a mistake? Here's how to delete floors and walls!
💡Special Note:
If you'd like to delete a wall, ensure you're in the 'Walls' category of Mapmaker, and if you'd like to delete flooring, make sure you're in the 'Floors' category!
✨ Select the area you'd like to delete and press the 'Delete' key on your keyboard
✨ Next, replace the walls/flooring using the steps above 🔥 Easy!
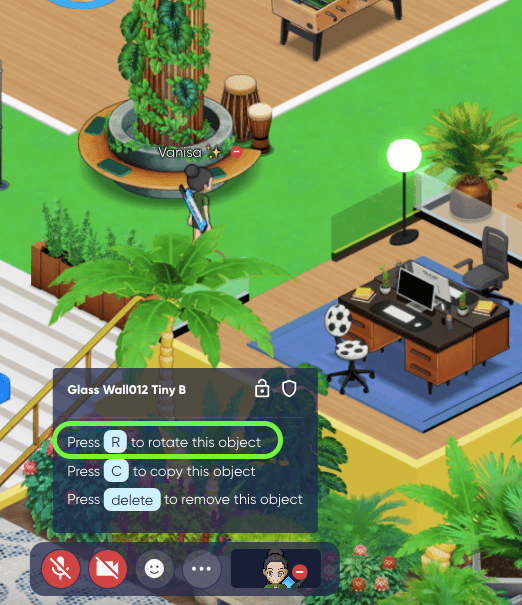
Not quite right? Let's discover how to rotate a wall!
✨ Select the wall you'd like to rotate and press the 'R' key on your keyboard
✨ Repeat this step until your wall is where you'd like it to be, and place it down
✨ You can follow these same steps to rotate your flooring
Floors and Walls Tips 💡
1. Need more room? Walls can be deleted, and your office can be expanded!
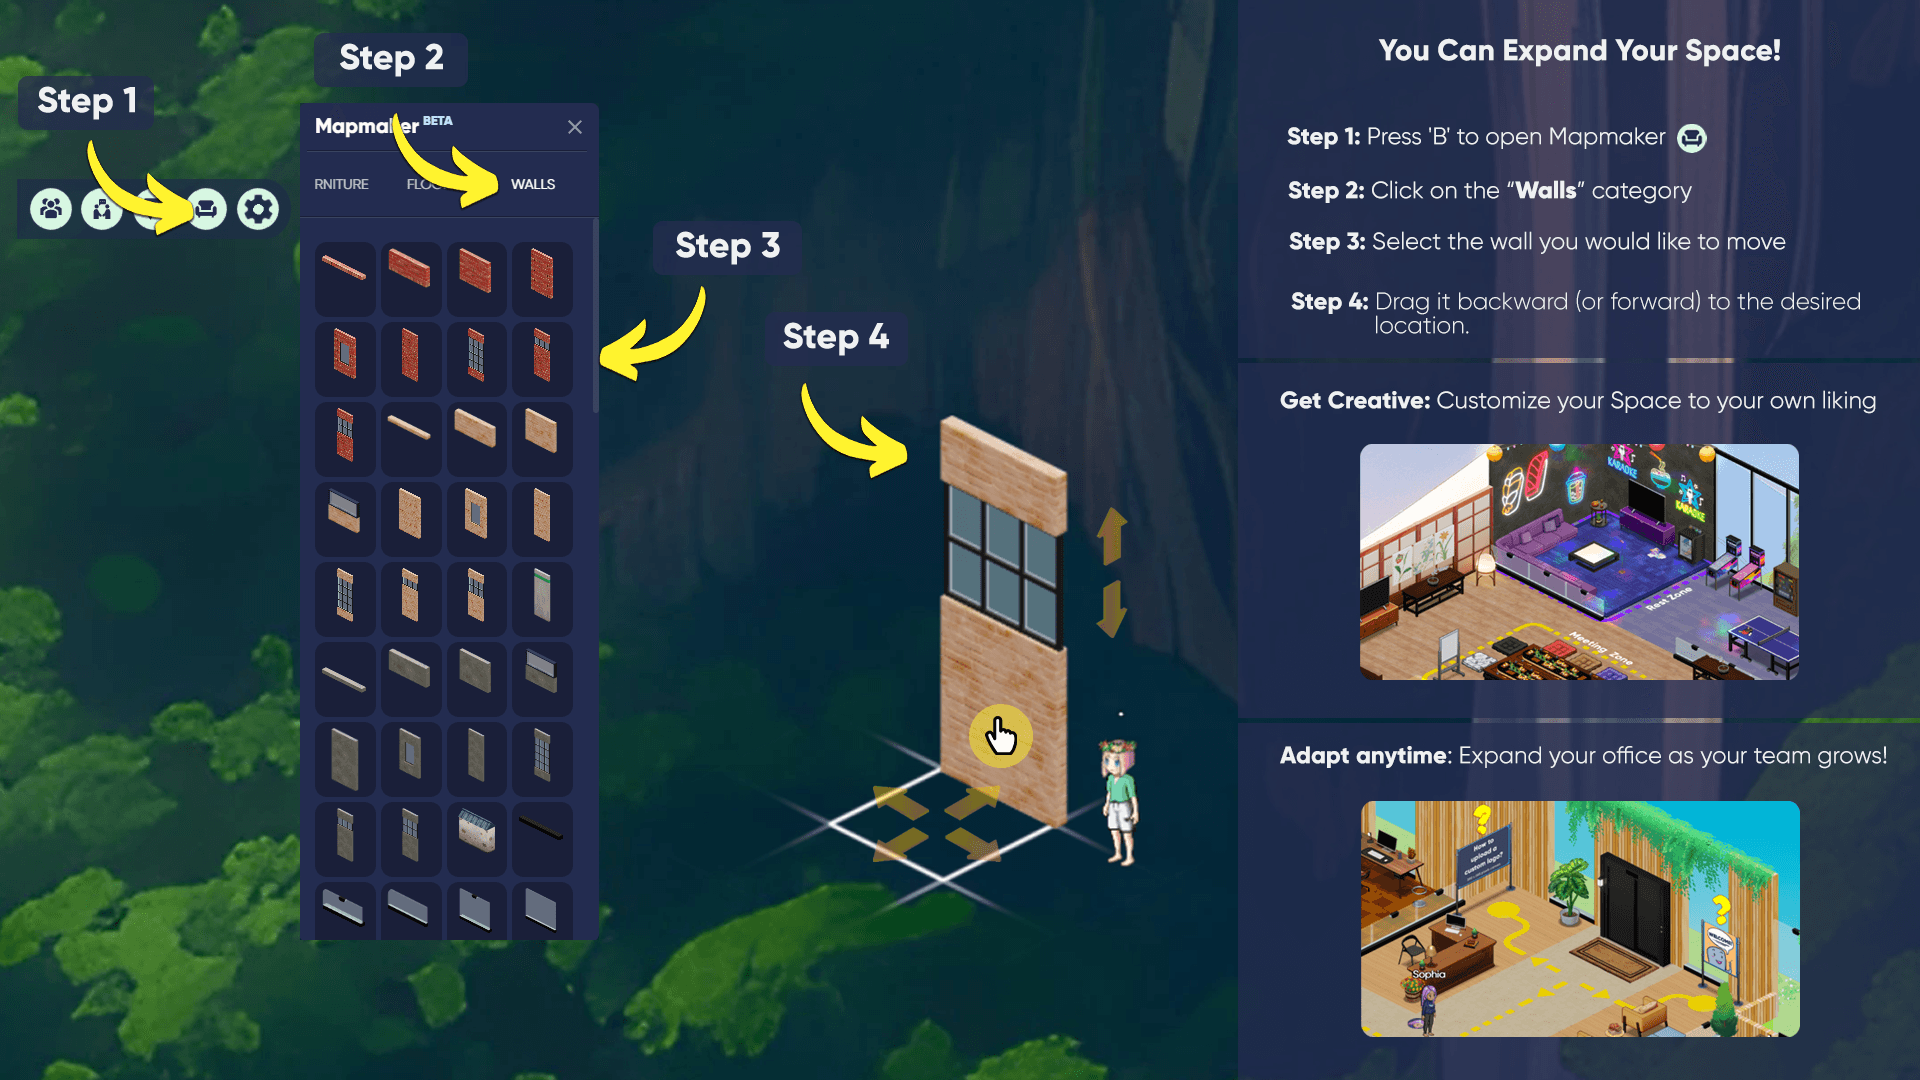
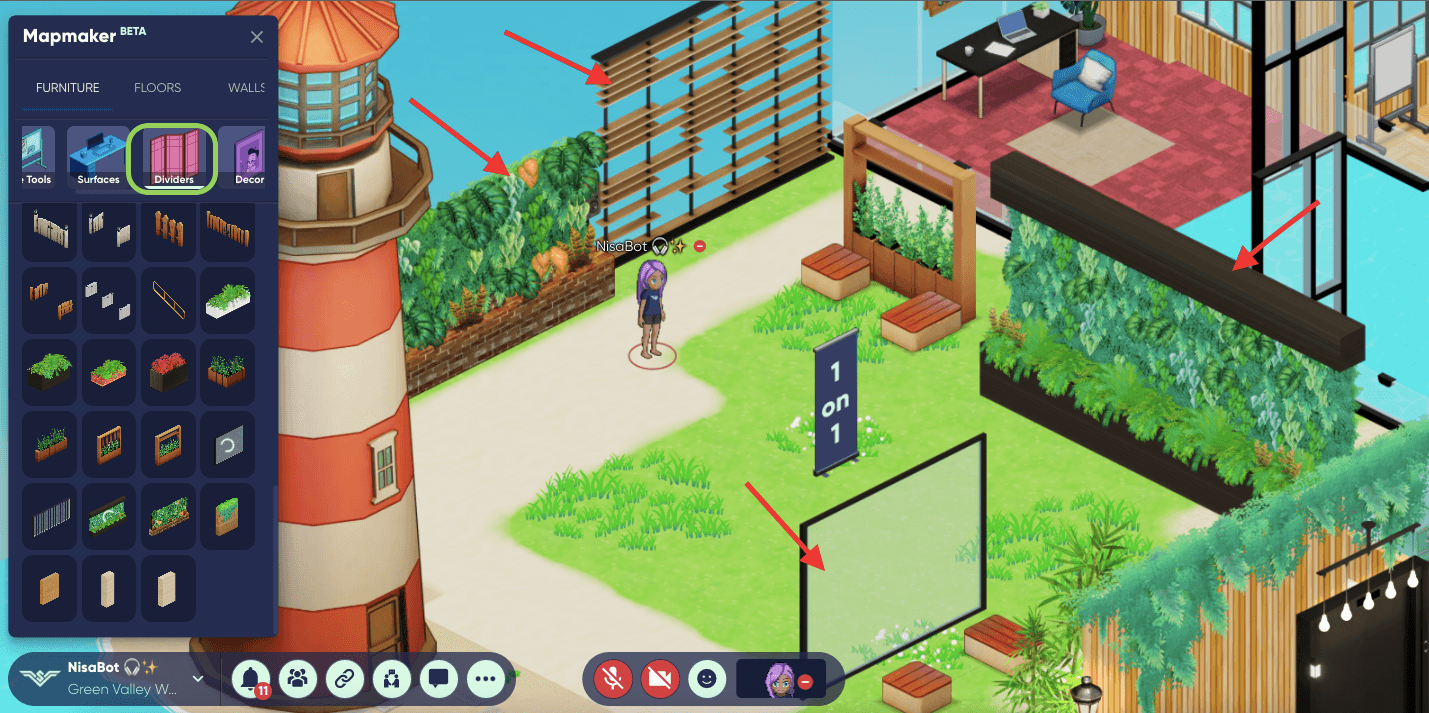
2. Watch out! There are some objects that look like walls - like in the 'Divider' category in Mapmaker, but to delete or edit these, you'll have to be in the main 'Furniture' section, and not in the 'Walls' section of Mapmaker.
✨ Have a look at some examples below! These objects may look like walls, but they're actually in the 'Dividers' area :)
3. Did you know that you can drag and place multiple floors/walls at the same time?
✨Here's how!
Still need help?
Reach out to us on intercom!
